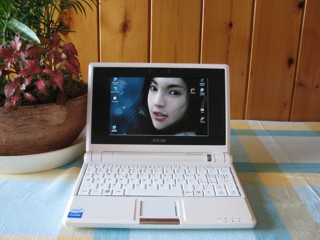
2.2 VEGA ZZ installation on Asus Eee PC
2.2.1 Introduction
2.2.2 What's you need
2.2.3 Preparing the Windows XP CD
2.2.4 Windows XP installation
2.2.5 Using a SD card to increase the storage
2.2.6 VEGA ZZ installation
2.2.7 Optimizing the VEGA ZZ configuration
2.2.8 Increasing the Eee PC computational power
2.2.9 More power ...
2.2.1 Introduction
With the Eee PC product line, Asus introduced a new notebook concept in which
weight and dimensions are minimized to use the PC anywhere. This small PC is
perfect to create an ultra-mobile workstation to explain the molecular
modelling concepts in the classroom, to realize a new idea anywhere, to control your HPC system trough the wireless connection, etc.
At this time, Eee PC is available only with the powerful Xandros operating
system that is unable to run VEGA ZZ. Fortunately, Asus included all drivers to install
Windows XP, making possible to run VEGA ZZ. Due to the small SSD (Solid State
Disk) storage system, the
installation procedure requires attention to reduce the waste of disk
space.

2.2.2 What's you need
- Asus Eee PC 4G or 8G (Surf).
- Microsoft Windows XP Professional (the Home edition seems to have
problems with the Eee PC).
- Asus support DVD included in the Eee PC box.
- External USB DVD-Rom drive. It could be enough a CD-Rom drive, but a 2
Gb USB Pen Drive is required to install the drivers.
- 4-16 Gb SDHC card (optional if the operating system is enough shrink).
- A desktop Windows PC with CD/DVD writer.
- nLite software (available for free at
http://www.nliteos.com).
- Windows XP Service Pack 2 or 3 (click
here to download the SP2).
- XP Remove Hotfix Backup (click
here to download the Zip file).
- EeeClock utility to change the Eee PC FSB from 70 to 100 MHz (click
here
to download it).
- Latest VEGA ZZ setup package (available for free at
http://www.ddl.unimi.it/vega).
2.2.3 Preparing the Windows XP CD
Not all components installed by the standard Windows setup are really
required (e.g. the driver database, some services, etc) and thanks to nLite
is possible to exclude some of them to reduce the disk space occupied by the operating
system.
A complete tutorial to create a slimmed installation CD is available at:
http://wiki.eeeuser.com:80/howto:nlitexp
2.2.4 Windows XP installation
Before proceeding the Windows setup, backup your data because they will be
overwritten.
- Plug the USB cord of the external CD/DVD-Rom drive into a free USB port
of your Eee PC.
- Turn on your laptop and press F2 to go to the BIOS setup.
- In the Advanced settings page, switch the OS Installation
field to Start.
- Go into Onboard Devices Configuration submenu and enable all
peripherals.
- In the Boot page, go in the Boot Device Priority and put the USB
CD/DVD-Rom drive as 1st Boot Device.
- Put the slimmed Windows XP CD in the drive.
- In the Exit page, choose Exit & Save Changes and press
Enter.
After the reset, the Windows XP Setup procedure will start.
WARNING:
the following step deletes all data previously saved in the SSD and they will lost definitively.
- When the setup shows the disk where install the operating system, remove
all four Xandros partitions and select all unpartitioned space using
the NTFS file system.
- At the setup end, go to the BIOS settings (press F2 when
the system boots) and in the Advanced settings page, switch the OS
Installation field to Finish.
- In the Exit page, choose Exit & Save Changes and press
Enter.
To reserve more disk space, you could disable the Automated System
Recovery (ASR):
- Start Windows, go to the Control Panel (Start -> Settings ->
Control Panel), click Switch to
Classic View and double click the System icon.
- Select the System restore tab and uncheck Turn off System
Restore on all drives.
- Click the OK button.
The system restore service is no more needed and so it can be disabled:
- Go to the Control Panel, double click Administrators Tools,
double click Services.
- Double click System Restore Service and in the General tab
push the Stop button.
- In the Startup type field, select Disabled.
Optionally, to speed-up the boot and increase the amount of free physical memory, the remote assistance and the desktop sharing
van be disabled:
- Go to the Control Panel, double click System and select
the Remote tab.
- Uncheck both Remote assistance and Desktop sharing.
- Press the OK button.
Driver installation:
- Put the Asus support DVD in the DVD-Rom drive. If your drive reads CDs
only, use the DVD-Rom reader of your desktop PC to copy all files from the
ASUS DVD to a pen drive (2 Gb are enough).
- The DVD should start automatically if the autorun is enabled, but if
it's not enabled, run Setup.exe in the root directory.
- Use the automated procedure to install all drivers.
Update the operating system:
These steps reduce the amount of disk space, removing the
backup files:
- Open the command prompt and type:
sfc /purgecache
and press return to clear the system backup files.
- Download
XP Remove Hotfix Backup, unzip and run it.
- Click the Continue button.
- Click Remove Backup Files and Add/Remove entries. In this way,
the updates can't be uninstalled, but a large amount of disk space is freed.
Some other files can be deleted:
- Delete all directories in C:\WINDOWS\$hf_mig$ and not $hf_mig$.
This is the hotfix setup directory.
- Delete all files and directories in C:\WINDOWS\Help and not Help. This directory contains the Windows XP help files: removing them,
the help will be unavailable.
To increase the available disk space, it's possible to reduce the Internet
Explorer file cache to 8 Mb and the size of the swap file used as virtual
memory.
- Go to the Control Panel and double click the Internet Options
icon.
- In the General tab, Browsing history section, click the
Settings button.
- In the Temporary Internet Files box, put 8 as disk space.
- Click the Ok button.
Change the size of the swap file:
- In the Control Panel, double click the System icon.
- Choose the Advanced tab and in the Performance area, click
the Settings button.
- In the dialog that opens up, choose the Advanced tab and select
Change in the Virtual memory box.
- In the Paging file size for selected drive, put 256 in
both Initial size and Maximum size fields.
- Click the OK button two times.
If you expanded the memory of your Eee PC from 512 Mb to 2 Gb, installing a 2
Gb SoDIMM DDR2 667 MHz module, you could consider to disable the virtual memory,
selecting No paging file.
2.2.5 Using a SD card to increase the storage
A 4-16 Gb SDHC (Secure Digital High Capacity) card is a good choice to
increase the storage size, moving some directories on it.
- Insert the card in the slot on the right side of your Eee PC. It will be
automatically recognized by Windows XP.
A new SDHC card is pre-formatted with the FAT32 file system that is not very
efficient to manage the disk space due to the too big cluster size. For this
reason, some disk space is lost writing small files on the SD. To avoid the
problem, you could format the card with NTFS file system that generates
smaller clusters. Unluckily, Windows XP doesn't allow to format the removable
devices with NTFS, but the convert.exe included in the standard Windows
distribution can convert any disk from FAT16/32 to NTFS.
- Open the command prompt and type:
convert e: /fs:ntfs
- and press return. After few seconds, the old FAT32 disk is converted to
NTFS.
- In the E: disk, create My Documents, Program Files
and Temp directories.
- Change the pre-defined My Documents directory to E:\My
Documents, clicking with the right mouse button on My Documents
on the desktop, selecting Properties and changing the destination to
E:\My Documents. In this way, all files putted in the My Documents
folder will be automatically saved in the SD card.
Use the E:\Program Files directory to install the new software,
reserving the internal SSD for the system files.
Another good idea to is to move the Outlook Express data files from the
user profile directory in C: to E:
- Create the E:\My Documents\Outlook Express directory.
- Start Outlook Express and create your e-mail profile if you
didn't create one.
- In the menu bar, select Tools -> Options ... and in the
Maintenance tab click on the Store Folder button.
- In the dialog window, click the Change button and browse E:\My
Documents\Outlook Express.
- Click OK. The changes will be made after you exit and restart
Outlook Express copying automatically all files from the old to the new
directory.
2.2.6 VEGA ZZ installation
In this section will be explained how to install VEGA ZZ on the Eee PC.
- Download the latest VEGA ZZ package and start the setup.
- Choose the setup language and press OK.
- Click Next, choose I accept the agreement and click
Next.
- As installation directory, put E:\Program Files\VEGA ZZ and click
Next.
The Eee PC has a Celeron M CPU and the components for the other CPU models
can be omitted:
- Uncheck:
- Optimized components for P4 CPUs (Intel Pentium IV)
- Optimized components for K7 CPUs (AMD Duron, Athlon, Sempron)
- Optimized components for K8 CPUs (Intel Opteron, Athlon 64/FX, Sempron 64)
- Uncheck other components also:
- WinDD data de/compressor
- VEGA SE (Screen Saver Edition)
- Click Next.
- Specify where to put the VEGA ZZ item in the Start menu and click
Next.
- Look the file extension associations and press Next.
- Finally, click the Install button.
- Install the REBOL script engine in the E:\Program Files\REBOL
directory.
At this step, you need to activate VEGA ZZ, following the procedure
explained in the Installation and activation
chapter.
2.2.7 Optimizing the VEGA ZZ
configuration
VEGA ZZ 2.2.0 can detect the Eee PC and automatically enables some window
optimizations, but if you are running a previous version, it may be possible
that you need to switch from 800x480 to 800x600 screen resolution to manage the
large windows.
The Intel GMA 900 graphic card is full working but has a limited OpenGL support:
- Multi-sample anti-aliasing not supported.
- Offline hardware rendering not fully supported (pbuffer).
- Vsync not available in window mode.
- Buggy implementation of the vertex buffer.
Intel claims OpenGL 1.4 features, but bugs and missing extensions makes this
graphic adapter OpenGL 1.2 compliant only.
For the best view experience:
- Enable the vector anti-aliasing (click here).
- Disable the vertex buffer in surface rendering (click
here).
2.2.8 Increasing the Eee PC computational
power
The Eee PC is factory downclocked to increase the battery life, but if
the stock computational power is not enough for you, it's possible to change the
Front Side Bus (FSB) from 70 to 100 MHz. In this way, the CPU goes from 630 to
900 MHz with a 30 % increment of the computational power. This is not a real overclock because the Celeron M was designed by Intel to run with a 100 MHz FSB.
- Download the
EeeClock
software, unzip and run it.
- In the tray bar, click on the 70 icon and choose Full (100 MHz) in the
menu. Your Eee PC is now running at 900 MHz.
You can change FSB in any time, but I found problems suspending the system
when the FSB differs from 70 MHz (system lock).
WARNING:
The Author of this guide accepts no responsibility for hardware/software
damages.
2.2.9 More power ...
If the Celeron M @ 900 MHz is not enough for your MM calculations, VEGA ZZ
can help you to break this barrier thanks to the possibility to run remote jobs
(see Configuration of remote hosts).
2.2.9.1 What's you need
2.2.9.2 Configuration of the Windows host
In this section will be explained how to configure a remote host in order to
perform MM calculations submitted by the Eee PC (or any other remote PC).
- Install VEGA ZZ, checking Warp utilities for secure Internet
connection in the Select Components page of the setup wizard.
- Activate VEGA ZZ if you want use it in interactive mode (see the Installation and activation
chapter).
Now you need to configure the WarpTel service that is an encrypted
telnet daemon (for more information, click
here).
- Start the service in interactive mode (Start -> VEGA ZZ ->
WarpProject -> WarpTel -> WarpTel).
- If you are running on Windows XP, unlock the software because the
firewall has detected its TCP/IP port.
- Click on the green square icon on the tray bar and select Settings.
The configuration dialog will be shown.
- Change the User name, the Password and annotate the
WarpKey (copy & paste in an empty text file). The WarpKey is used to
encrypt the connection and it's randomly generated when WarpTel starts at
first time.
- Finally, click the Ok button.
- If your host has a DNS entry, annotate its name, otherwise open the
command prompt and type
ipconfig /all
and press return.
- Annotate the IP address of the Ethernet card connected to the LAN.
It's possible to run WarpTel as Windows service and the procedure to do it is
explained in the WarpTel manual.
2.2.9.3 Configuration of the Linux host
The configuration of a Linux host is a little bit hard and it's reserved to
power users:
- Create an user account and annotate the user name and the password (both are
required for the client configuration).
AMMP is the calculation module and must be installed:
- Download the AMMP full package, unpack it, choose the more appropriate
executable for your system (Linux 32 or 64 bit) and copy ammp to the
home directory of the user created previously.
- Change the file permissions, typing in the command shell:
chmod 755 ammp
- Enable the telnet daemon, because in some Linux distribution is disabled
by default.
- In the firewall settings, close the TCI/IP port 23 and open the 7000.
Both these operations are depending on the specific Linux distribution and
so I'm unable to explain them step by step.
Now, you must install the WarpGate daemon that creates the encrypted
tunnel between the host and the client. To do it, you must be logged as root.
- Download the WarpGate package for Linux, unpack it.
- Run WarpKeyGen to generate the 256 bit encryption key and
annotate it.
- In the warpdata/cfg directory edit the warpgate.ini file,
remove the default entry and put:
; Local port  Local conn.  Remote host                 Remote port  Type  Key
; ========================================================================================================================================
  7000            N        localhost                   23            TCP   <Put here the key generated by WarpKeyGen>
-
Copy the warpgated executable in
a system accessible directory (e.g. /usr/local/bin).
-
Copy the waprgate.ini file in the
/etc directory.
-
Check the current runlevel,
opening the /etc/inittab file and looking the id:X:initdefault
line. X indicates the default runlevel (usually 5).
-
Change the current directory to /etc/rc.d/rcX.d,
where X is the runlevel.
-
Create a soft link to warpgated:
ln -s /usr/local/bin/warpgated S98warpgated
- To start the service reboot the system
or type /usr/local/bin/warpgated
2.2.9.4 Configuration of the client (Eee PC)
- Starts VEGA ZZ.
- In the menu bar, select Tools -> Host configuration: the Host
configuration window will appear.
- Press the Add button.
- Put the host Name (e.g. My host), the Type (Linux
for Linux 32 and 64 bit, Windows 9x for Windows 95/98/ME or
Windows NT for Windows NT4/2000/XP/XP x64/Server 2003/Vista).
- Set the number of thread that the remote host is capable to run at the
same time (it's the number of CPUs/cores, including the virtual CPUs).
- In the Address field, put the DNS host name or the IP address and
type 7000 in the Port field.
- Put the User name, the Password and the WarpKey as
in the WarpTel configuration.
- Check Encryption to enable the secure encrypted connection.
- Optionally type the host Description.
- Press the Save button.
The client configuration is finish and now a test is required.
2.2.9.4 Running a remote calculation
To do this step, the Eee PC must be connected to the LAN or to Internet if
the host is connected to it. This is the best scenario because in this way you
can use anywhere the computational power of the remote host. The Eee PC
connection can be done indifferently by Ethernet or wireless adapters.
- Open the VEGA ZZ console (View -> Console). It's closed by
default when the Eee PC is detected by VEGA ZZ 2.2.0.
- Open the molecule a3.mol2 in the ...\VEGA ZZ\Molecules
directory (File -> Open).
- Select Calculate -> Ammp -> Minimization and in the
Minimization tab, put 3000 Minimization steps, 0.01 as Toler
and 0 Steepest steps.
- Choose Conjugate gradients as minimization algorithm.
- In the Hosts tab, click on one My host item. There are
more than one hosts with My host name if the remote system can manage
more than one thread at the same time.
- Click the Run button. If all settings are right, the calculation
starts and the console shows the progress.
We successfully tested the Eee PC with a dual AMD Operton 250 @ 2.4 GHz
workstation running Windows XP and a eight dual core AMD Opteron 875 @ 2.2 GHz
(16 cores) HPC system running 64 bit Linux (CentOS distribution): imagine the
amazing power of this last system inside your small Eee PC ...